Hola, como han estado?, espero que muy bien. Hello, how are you been? I hope very well. Hoy quería mostrarles una tarjetita que hice por Navidad para un intercambio entre amigas scraperas ... ya se, ya se Navidad ya paso ... jajajaja .. lo siento me demore en subir el vídeo ... pero ... use diferentes técnicas que ustedes pueden usar de manera muy creativa para crear tarjetas con otros motivos. Today I wanted to show a little card I made for Christmas, for an exchange between scraper friends..... I kno, I know, Christmas already happend a time ago ... hahahaha...I´m sorry it took me forever to uploading the video...but.. I used different techniques which you can use in a very creatively way to create cards with other thems.
La tarjeta tenía que tener dos elementos, gesso y un shaker, fue la primera vez intentando un shaker para mi, me encantó le agrega un lindo efecto a las tarjetas. Ya que tenia que usar gesso intente darle un tono mixed media a la tarjeta, use estenciles, un poquito de escarcha, flores en pergamino, los schaker y algunas microesferas. The card must to had two elements, gesso and a saher, it was the first time trying a shaker for me, I loved it, it add a nice effect to the cards. Since I had to use gesso, I tried to give it a mixed media tone to the card, I used stenciles, a little bit of glitter, vellum flowers, the schaker and some microbeads.
Espero que les guste algunas de las técnicas y les ayude un poquito a seguir creando cositas hermosas. I hope you like some of the techniques and help you a little bit to create beutiful things. Aquí les dejo el vídeo. Here is the video.
Nos vemos en el siguiente post. See you in the next post.
Lo siento, me desaparecí un poquito, las clases de Tim Holtz son muy interesantes y me están tomando más tiempo de lo que pensaba. Pero para compensarlos hoy les estoy trayendo 2 tarjetas de Heartfelt Creations.....(^_-)
Sorry, I disappeared a bit, Tim Holtz classes are very interesting and I is taking me longer than I thought. But to compensate you today I am bringing two cards of Heartfelt Creations ..... (^ _-)
Para la primera tarjeta usé los sellos y cortadores de la colección All Glammed Up de Heartfelt Creations. El proceso no es muy complicado, primero sellé el zapato en polvos de embosing magenta de Ranger y luego usando el Scoring Board se realiza un pequeño doblez para darle forma a la tarjeta y cortarlo usando la Big Shot.
For the first card I used the stamps and dies from All Glammed Up collection by Heartfelt Creations. The process is not very complicated, first I sealed the shoe in magenta powder embosing from Ranger and then using the scoring board I made a small fold to my paper, to created the shape of the card and finaly I cut it using the Big Shot.
Luego usando la colección Botanical Rose, selle y corte algunas flores y hojas para adornar el zapato.
Then using the Botanical Rose collection, I sealed and cut some flowers and leaves to decorate the shoe.
Para pintar las flores y el zapato usé las tintas memento Angel Pink, Rose Bud and Love Letter. Para las hojas use las tintas Bamboo Leaves y Cottage Ivy.
To paint the flowers and the shoe I used memento inks Angel Pink, Rose Bud and Love Letter. For the leaves I used Bamboo Leaves and Cottage Ivy.
Ya después de eso solo queda darle un poco de forma a las flores con un boleador, un poco de brillo y pegar todo.
And after that there is only give some shape to the flowers with a bowler, some glitter and glue everything.
Aqui les dejo el video. Here the video.
Para la tarjeta de la taza de café se sigue el mismo proceso, sellé la taza con la tinta Distress Walnut Stain y polvos embossing clear de Hero Arts. Usando el Scoring Board se realiza un pequeño doblez para darle forma a la tarjeta y cortarlo.
For the coffee mug card , the same process is followed, I sealed the cup with Distress Ink Walnut Stain and I used clear embossing powders from Hero Arts. Using the Scoring Board a small fold is done to shape and cut the card.
Para pintar la taza use las tintas distress Chipped Sapphire y Broken China para la parte azul y Antique Linen y Vintage Photo para el marrón.
To paint the mug I used distress inks Chipped Sapphire and Broken China for the blue and Antique Linen and Vintage Photo for the brown.
En la misma colección viene la espuma de la taza de café y pequeños granos de café. La espuma la sellé y la corté y luego le agregue un poco de escharcha para darle un poco de brillo.
In the same collection comes the foam for the coffee mug and small coffee beans. I sealed the foam, cut it and then add some glitter to give a little shine.
Esta es otra toma de la tarjeta final.
This is another picture of the final card.
Aquí les dejo el video. Here the video.
Espero que les haya gustado y que me dejen un like.
Después de correr, como siempre (T_T), les traigo el reto del mes de mayo de Tim Holtz. Si no pudieron verlo aqui les dejo el link.
After running as usual (T_T), I could finish the challenge of Tim Holtz for May. If you din´t see it here is the link.
Como se habrán dado cuenta, los retos de este año son una mezcla de dos técnicas que ya había utilizado en sus retos de tags de años anteriores. La primera técnica se trata de resistencias, para lograr esto se usa un poco de washitape, de preferencia de un color muy suave que no interfiera con el resto del proyecto. Aquí coloque un washi en dos lugares donde quería usar la técnica de resistencia.
As you may have noticed, the challenges of this year are a mix of two techniques that he had used in their challenges from previous years. The first technique is resistance, to achieve this you need to use some washitape, preferably of a very light color that does not interfere with the rest of the project. Here I used washi in two places where I wanted to use the resistance technique.
Con una tinta a prueba de agua, sobre el washitape, sellan la figurita que más les gusten, en mi caso use los Crazy Birds de Tim Holtz. Luego pueden colocar diferentes sellos en las partes que no tiene washitape, estos formaran parte del fondo.
With a waterproof ink, on the washitape, you can stamp any form you like, in my case I used the Crazy Birds of Tim Holtz. Then you can put different stamp on the parts that do not have washitape, build the background.
La siguiente parte, es agregar pasta texturizada con diferentes esténciles, que vayan más o menos con la idea del proyecto.
The next part is to add texture paste with different stencils, that goes more or less with the project idea.
Luego solo nos queda colorear nuestro fondo, con diferentes tintas y medios, aquí use distress inks y perfect pearls mist, en la técnica original usan distress paints, que son como acrilicos, como ya les habia comentado por aqui todavia no llegan. Los colores quedaron un poco suaves como watercolors.
Then we just have to add color to our background with different inks and media, I used distress inks, in the original technique he used distress paints, which are like acrylics, as I had already told you they not come here yet. The colors were a little soft like watercolors.
La segunda parte de la técnica era usar el cortador tiny tattered floral de Tim Holtz, lamentablemente todavía no llega por aquí. Con la ayuda de la silohuette cameo, logre obtener unas bases de flores similares a la de la tecnica.
The second part of the technique was to use the tiny floral tattered cut by Tim Holtz, unfortunable they not come here yet. With the help of the silohuette cameo, I could obtaining a similar shapes like those flowers.
Luego solo queda colorearlas y armarlas, yo use los mismos colores del fondo para pintar las flores darle mayor realce.
Then just is matter of color them and assemble them, I used the same background colors to paint the flowers to give greater visual effect
Algunos elementos más para embellecer el cuadro y listo el reto.
Aquí les dejo unos acercamientos.
Some more elements to embellish the box and the challenge is ready Here are some details.
Finalmente, no puedo irme sin dejarles el video de las técnicas. Aqui esta, con algunas fotos de la tag en el video.
And finaly , I can´t leave witout leaving the tecnique video. So here it is, with some pictures of the tag from the video.
Como les había comentado la semana pasada, participe en un concurso de tarjetas que había realizado una de las tiendas de Scrapbook que se puede encontrar en mi país, la tienda se llama Lápiz de Papel, así la pueden encontrar en Facebook. Quede entre las 4 ganadoras con tres tarjetas en las que mezcle varias técnicas.
As I told you last week, I participate in a card contest made by ¨Lapiz de Papel" a scrapbook storen my country. I was one of the 4 winners with three cards that mix several techniques.
Les voy a ir mostrando poco a poco cada una de ellas, hoy les voy a mostrar la tarjeta cascada. No es una tarjeta muy complicada una vez que aprendes como hacerla y se puede usar para muchas ocasiones porque te da mucho espacio para adornarla como quieras.
I'm going to show you one by one the cards I made, today I'll show you the cascading card. It is not a very complicated card once you learn how to make it and you can used it for many occasions because it gives you plenty of room to decorate it as you like.
Voy a tratar de hacer la explicación lo más simple que puedo y para mayor referencia les voy a dejar un video al final. Este es el link de la pagina que use como referencia, tiene la explicación más sencilla.
I'll try to make the simplest explanation I can and for further reference I will leave a video at the end. This is the link of the page I used as a reference, is the simplest explanation I found.
Primero empezamos con una base de cartón, el color que quieran, de 12 pulgadas de largo y 8 pulgadas de ancho. Con la ayuda del Scoring Bord de Martha Steward u otra herramienta con la que cuenten, se tiene que marcar la base a las 2 pulgadas, 4 pulgadas, 8 pulgadas y 10 pulgadas. A las 6 pulgadas se hace una linea muy ligera solo como referencia porque no la vamos a necesitar para doblar la tarjeta.
First we start with a cardstock base, the color you want, 12 inches long and 8 inches wide. With the help of the Scoring Bord of Martha Steward or other tool you have, you mark the base at 2 inches, 4 inches, 8 inches and 10 inches. At 6 inches you mark a very light line, is only for reference, we are not going to used it to bend the card.
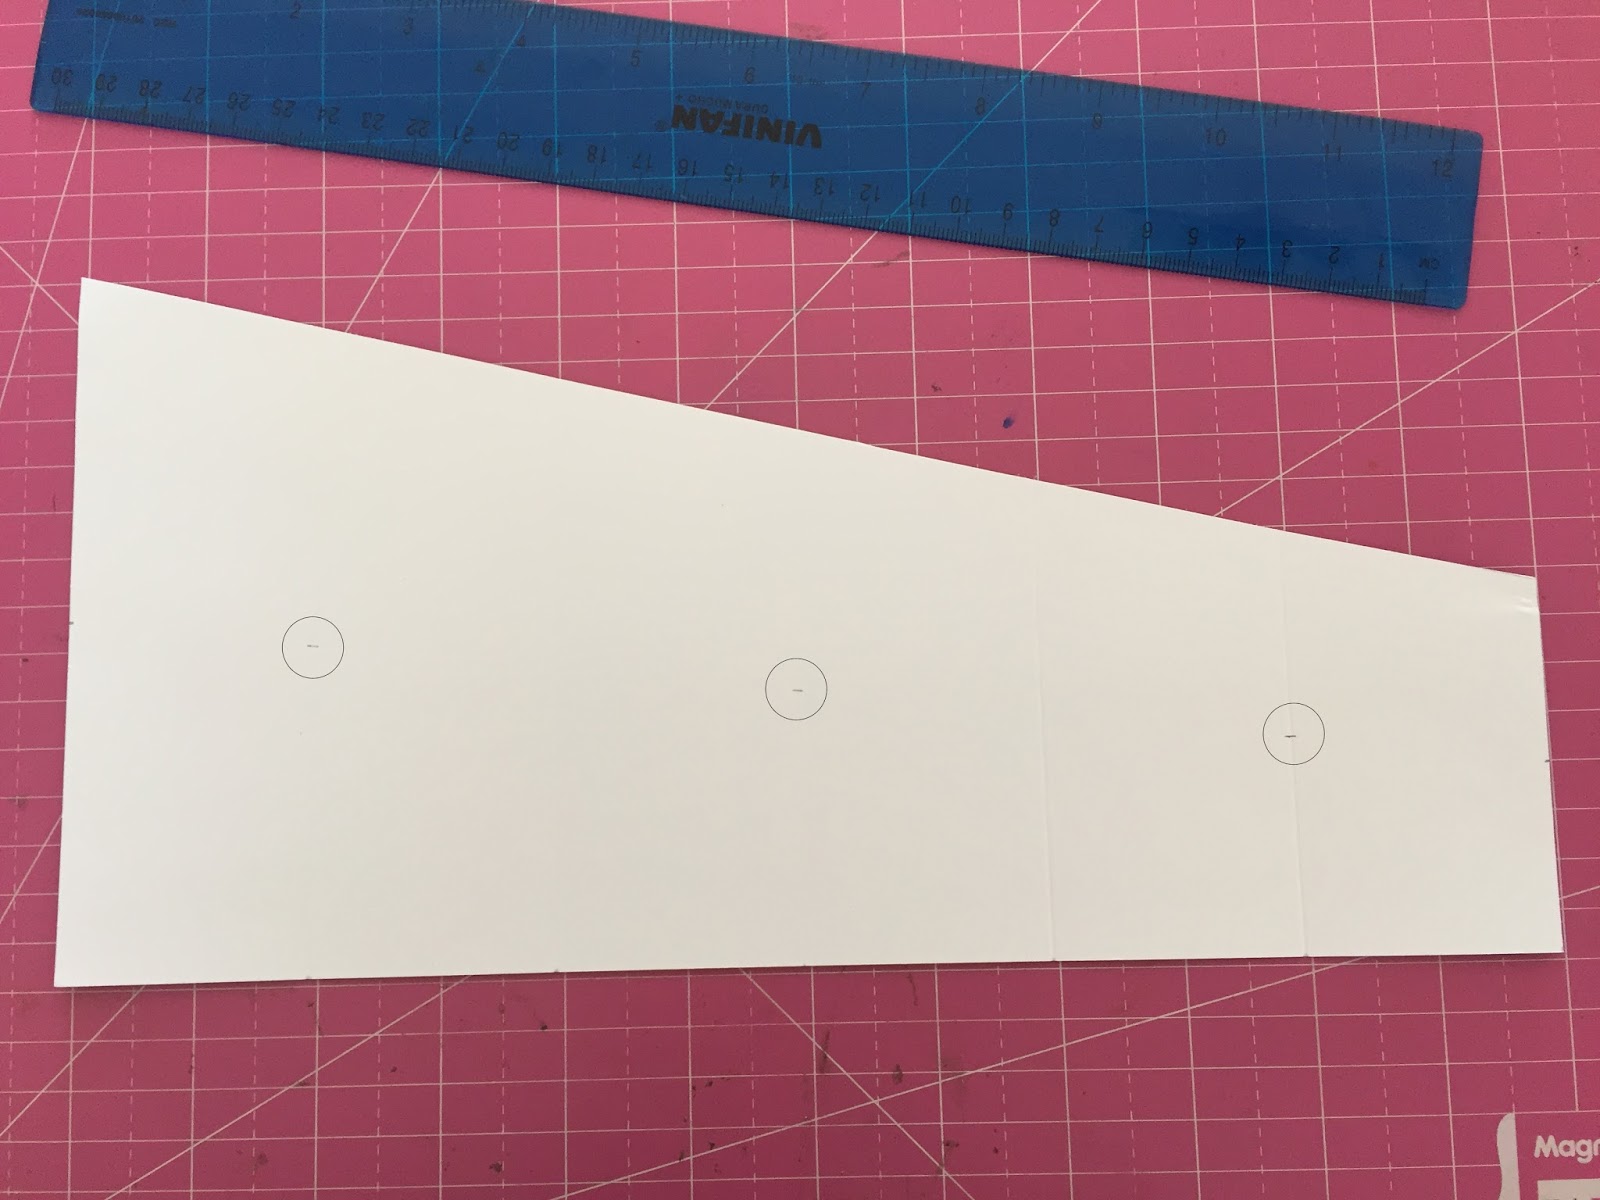
Con la cartulina marcada, en un lado de 8 pulgadas, se debe marcar con lápiz a las 5 1/2 pulgada, en el otro lado se debe marcar a las 2 1/2 pulgada de manera que al unir las líneas se formen dos piezas del mismo tamaño.
After mark the cardstock, on one side of 8 inches you should score it with pencil at 5 1/2 inch, on the other side you should score at 2 1/2 inch, so that by joining the two marks you can form two some pieces.
Después de eso pueden dibujar una línea y cortar con tijera los dos pedazos o si tienen una cuchilla la pueden utilizar para cortar más rapido. Al terminar de cortar deben tener dos pedazos iguales. After that, you can draw a line and cut with scissors the two pieces or if you have a cutter you can be used it to cut faster. When you finish cutting you should have two equal pieces.
En cada pedazo, en la parte más larga, se debe marcar exactamente la mitad, 2 3/4 pulgadas, y en la parte más pequeña 1 1/4 pulgadas. Esas marcas se unen con una regla para usarla como referencia, se debe colocar una marca donde la regla cruza las marcas de 2 pulgadas, 6 pulgadas y 10 pulgadas. In each piece, in the longest part, you should mark exactly the half, 2 3/4 inches, and in the smaller part 1 1/4 inches. You should join these marks with a ruler just be to use as a reference, you should put a mark where the rule crosses the marks of 2 inches, 6 inches and 10 inches.
En uno de los pedazos, siguiendo las marcas que hicimos anteriormente en el papel, se debe cortar desde la base hasta la marca de lápiz. En el otro pedazo siguiendo la marca, se debe cortar desde la diagonal hasta la marca. With one of the pieces, following the impressions we made on the paper, you should cut from the base to the pencil mark. In the other piece following the impressions, you should cut from the diagonal to the pencil mark.
Luego solo queda juntar los dos pedazos, cada abertura de un pedazo con la abertura del otro pedazo, luego se doblan por las marcas que habiamos hecho anteriormente. Then you have to join the two pieces, each opening of one piece with the opening of the another piece, then fold them by the impressions we had done previously.
Luego de eso solo queda adornarlo como quieren, pueden usarla para diferentes ocasiones, quedan muy bonitas e interesantes (^o^) . After that there is only matter of decorate it the way you wish, you can use it for different occasions, they gave a very beautiful and interesting twist (^o^). Espero que hayan podido entender la explicación, si les parecio muy complicada aqui les estoy dejando un video explicando todo paso por paso (^_-). I hope you have understood the explanation, if they seemed very complicated here'm leaving you a video explaining everything step by step (^ _-). Sorry again is only in spanish, but I can translate if you want, let me know.
Espero que les haya gustado y si tienen alguna duda o necesitan ayuda con las dimensiones me pueden escribir y tratare de responder lo más pronto posible. I hope you liked it and if you have any questions or need help with the dimensions, you can write me and I'll try to answer as soon as possible. Muchas gracias por darse un paseito por aqui, nos vemos en el siguiente post. Cuidense. Thank you very much for giving stopping by, see you in the next post. Take care.
Espero que hayan estado muy bien, la semana pasada fue de semana de feria de manualidades en Lima, y por primera vez me atreví a participar en un concurso de tarjetas creada por una de las tiendas que vende materiales de scrap (Lápiz de Papel) y que creen, fui una de las ganadoras, estoy tan feliz, nos tomaron fotos, expusieron nuestros trabajos y nos dieron regalitos yeahhhh (^-^), en los próximos post voy a ir colocando las tarjetas que prepare para el concurso y las técnicas que use. I hope you have been very good, last week was a week of craft fair in Lima, and for the first time I dared to participate in a contest card created by one of the stores that sell scrapbook materials (Lápiz de Papel) and guess what, I was one of the winners, I'm so happy, they took us pictures, they presented our work and gave us little gifts yeahhhh (^-^), in the next post I will be putting the cards I prepared for the contest and the techniques that I used.
Ahora si al post de hoy, por fin termine la tag y la tarjeta que prepare para el reto del mes de Abril de las 12 tags de Tim Holtz. Aqui les dejo el link al blog de él y a las técnicas originales. Una cosa que me prometí al iniciar este reto es que si podía conseguir los productos de Tim Holtz para hacer las técnicas que el enseñaba los iba a comprar, habiendo dicho eso, para este reto se me puso un poco difícil porque muchos productos no llegan a Perú, pero para eso esta la creatividad, si ustedes pueden encontrar sus materiales cómprenlos ... jajaja ... muero por tenerlos. Ok, now to our business, finally I finished the tag and the card I prepared for the challenge 12 tags of 2016- April from Tim Holtz. Here is the link for his blog and to the original techniques. One thing I promised myself at the begin of this challenge was that if I could get the products of Tim Holtz to make the techniques he taught, I was going to buy them. Having said that, for this challenge I got it a little bit difficult because many products for the techniques are not sell in Peru, but for that is the creativity, if you can find them buy them they are pretty cool ... lol ... I die for have them.
La primera parte de la técnica era trabajar con resistencia de pinturas. Para eso había que usar un cartón con relieve, use el woodgrain esténcil de Tim Holtz con la big shot y le pude dar un relieve bonito, sobre el relieve se tiene que usar distress paint, pero aquí como mencione nadie lo trae, leyendo los componente vi que la pintura acrílica un poco húmeda podía servir para reemplazarlo. The first part of the technique was paint resist. For that you have to use a cardstock with texture. I used the woodgrain stencil from Tim Holtz with the big shot to emboss the cardstock and give it some texture, over the emboss you used distress paint, but here as I mentioned before nobody brings it, reading the components I saw that a little wet acrylic paint could be used to replace it.
La pintura nos va ha dar un poco de resistencia cuando usemos las tintas distress y va a poder verse el diseño en altorrelieve. Para darle color use los distress broken china, chipped sapphire, brused corduroy y gathered twigs. The painting is going to give us a little resistance when we use the distress inks and will be visiblethe emboss design. To color I used broken china, chipped sapphire, brused corduroy and gathered twigs distress inks.
La segunda parte de la técnica era imitar la textura de las baldosas, para la figura elegí algunas flores del cortador Tattered Flowers de Tim Holts para Sizzix. Para imitar el efecto de las baldosas se usa el kid especial para esta técnica que tiene Tim Holtz, es un producto nuevo y todavia no está para ser importado a mi país, creanme pregunte por todos lados ..... (ーー;). En la técnica original usaba glossy acents para crear ese efecto y por suerteeso si llega a mi país, ese producto y un poco de pasta para texturizar, muchos papelitos japonese de origami y se pudo imitar el efecto. The second part of the tag was Faux Mosaic, for the figure I chosed some flowers from Flowers Tattered die cut by Tim Holtz from Sizzix. To mimic this technique you need the distress paper mosaic kit from Tim Holtz, is a new product and still is not to imported to my country, believe me I ask everywhere ..... (ー ー;). In the original technique, before the paper mosaic kit, he used glossy acents to create that effect and luckly that product you can find in my country, that and some texture paste, many pieces of origami paper and I could mimic the effect.
Para los toques finales, rociéuna cartulina blanca con varios colores naranjas y rosados y corte la tag y la palabra Hello. Le puse algunas hojitas, botones, mariposas, detallitos en metarl y quedo lista. For the final touches, I spry a white card with several orange and pink colors and cut the tag and the word Hello from it. I put some leafs, buttons, butterflies, little details in metal and the tag is ready.
Para el video que les prepare de las técnicas me decidí por usar la tag en una tarjeta para cumpleaños, aqui les dejo unos acercamientos y el video. For the video I prepare with the techniques I decided to use the tag on a birthday card, here I leave some approaches and video. I´m sorry the video is in spanish but if you wanted in english I can translated for you.
Espero que les haya gustado y me dejen sus comenarios . I hope you like it and live me your comments, I will appreciated.
Un abrazo a todos, nos vemos en el siguiente post. A big hug for you and see you in the next post.