Mostrando entradas con la etiqueta Tim Holtz 12 tags 2016. Mostrar todas las entradas

domingo, 27 de noviembre de 2016

Tim Holtz 12 tags 2016 - Noviembre / November


Hola como están?


Espero que muy bien, ya están con los preparativos para Navidad??.
Ya falta menos de un mes, no lo puedo creer ya casi esta aquí, yo ya estoy preparando mis proyectos navideños .... ya casi no queda tiempo (@_@)...este año no creo que me de el tiempo para preparar cosas muy grandes, pero algún detallito bonito para mis amigos del trabajo quiero preparar de todas maneras ... es Navidad .... época perfecta para los detalles preciosos con mucho glitter ... jajajaja .... cuentenme que están preparando ustedes??.
I hope you are well, are you with the preparations for Christmas ??. Is in less than a month, I can not believe it is almost here, I'm already preparing my Christmas projects .... there is almost no time left (@ _ @) ... this year I do not think I have the time to prepare things very big, but I really want to prepare some nice little details for my coworkers and friends ... it's Christmas .... perfect season for the precious details with a lot of glitter ... hahaha .... tell me what are you preparing ?? .

Les conté que fui una de las 10 seleccionadas del reto de la Tag de Octubre??? ...lo pueden creer(⌒▽⌒)yo aún no me la creo ... estoy tan feliz ....y casi casi que no logro publicarlo a tiempo .... como ahora corriendo ..... (^_^;)  jejeje..
I told you that I was one of the 10 selected in the October Tag Challenge ??? ... you can believe it (⌒▽⌒) I still do not believe it ... I'm so happy .... and almost I can not get it published on time .... like now running ..... (^_^;)  Lol ..

Para este mes la primera técnica del remix es de resistencia de color, hay diferentes técnicas de resistencia, pero aquí lo que se uso fueron stickers de transferencia, si stickers, por supuesto él tiene sus stickers especiales para lograr esta técnica, yo tuve la suerte de encontrar un juego en la última feria de manualidades, pero he visto en varias librerias varios tipos de stickers de transferencias que pueden servir.
For this month the first technique of the remix is of color resistance, there are different resistance techniques, but here what were used were rub on stickers, yes stickers, of course he has his special stickers to achieve this technique, I had the luck to find a set in the last craft fair, but I have seen in several bookstores diferent types rub on stickers that can be used.  

La idea es colocar estos stickers como primera capa y luego entintar el fondo con varios colores de distress dependiendo del motivo de la tag. aquí les dejo un acercamiento al fondo de la tag, los números y las flechas son los stickers. 
The idea is to place these stickers as the first layer and then ink the background with several distress colors depending on the theme of the tag. Here I leave an approach of the tag background, the numbers and the arrows are the stickers.


La segunda parte de la técnica es mi favorita usar sellos y plumones distress para acuerelar. Es muy simple la verdad, solo hay que sellar la imagen en papel acuarelable y usar un medio humedo (plumones, acuarelas, las tintas distress) para pintar la imagen. Luego se corta y se agrega a la tag.
The second part of the technique is my favorite you used stamps and distress pens to water color. It is very simple indeed, just seal the image on watercolor paper and use a liquid medium (pens, watercolors, distress inks) to paint the image. Then you cut the stamp and added to the tag.

Para adornar más la tag y darle un interes, se corta alguna palabra en material tipo corcho, para que siga con el tema otoñal, se puede usaralgún cortador de palabras, o si tiene cortadores de letras mejor porque pueden crear cualquier palabra que quieran, yo no tengo cortadores de letras, pero tenia esta palabra, que me parece la más adecuada para estas fiestas, porque creo que en esta epoca soy muy afortunada de tener a las mejores personas a mi lado.
To embellish the tag more and give it an interest, the sentiment can be cut in from a cork-like material, so that it continues with the autumnal theme, ypu can use a word die cut,  or if you have alphabeth die cuts much has better because you can create any word you want, I I do not have alphabeth die cut, but I had this word die cut, which seems, to me, the most appropriate for these time of the year, because I think that I am very lucky to have the best people by my side, expecially at this time of the year.

Aqui les dejo el acercamiento del sello.
Here I leave an approach of the stamps.


Y por último el videito para que puedan ver mejor las técnicas.
And finally the video, so you can see the techniques better, I'm sorry is only in spanish, but if you want it in english let me know.


Muchas gracias por leer nos vemos en el siguiente post.
Thank you very much for reading me, see you in the next post.

domingo, 30 de octubre de 2016

Tim Holtz 12 tags 2016 - Octubre / October


Hola a todos: 
Hello Everybody:


Como están, corriendo pero lo logre ^_^; logre terminar la tag para el reto de las 12 tags de 2016 de Tim Holtz para el mes de Octubre.
How are you? running but I succeeded ^ _ ^; I managed to finish the October Tag of the challange12 tags of 2016 by Tim Holtz.

Decidí hacer estas entradas un poco más fácil de seguir, para no llenarlas de fotos y muchas palabras. Voy a explicar en detalle las técnicas en los vídeos y por aquí les pondré lo básico para no aburrirlas mucho. Espero que les guste el cambio, cualquier comentario soy toda oídos(^-^). 
I decided to make these entries a little easier to follow, not to fill them with a lot of photos and many words. I will explain in detail the techniques in the videos and put here the basics not to bore you to much. I hope you like the change, and any comments I'm all ears (^ - ^).

Las técnicas para esta tag fueron dos, la primera es usar un collague de papeles con motivos de Halloween y sobre la superficie usar el Collage multimedium Crazing, que da un efecto craquelador en la superficie de los papeles. Luego la usando los crayones de Tim Holtz negro y blanco, pintar un poco las grietas para darle un efecto tenebroso .... jajajaja .....
(@_@). Aquí les dejo un acercamiento del efecto.

He used two techniques for this tag, the first is to used Halloween ephemra to create a collague and used Collage Multimedium Crazing, giving it a crackle effect on the surface of the papers. Then using Tim Holtz distress crayons, black and white, paint some of the cracks to give it a spooky effect .... hahaha ..... (@ _ @). Here is a close-up of the effect.


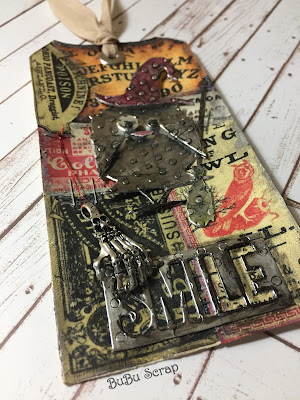
La segunda técnica es usar cinta foil sobre una cartulina, pasarla por un folder de embosing, si tuvieran uno que parezca industrial mucho mejor, de este papel se corta una figura que hará de nuestro hombre de hojalata, en el tag Tim Holtz uso las mascaras de monstruos de Sizzix, la idea es que se vea de metal y monstruoso .... jijiji...En mi caso no tenia las mascaras así que use uno de los Crazy Birds, un poco de acrílico negro para darle un tono industrial más viejo y listo la tag. Aquí otro acercamiento.
The second technique is to used foil tape on a white cardstock and them used an embossing folder to give it texture, if you had one that looks industrial much better, from this paper we are gonna trim a figure that will make our metal man, in the original tag Tim Holtz used moster masks from Sizzix, the idea is to see some metal and looks monstrous .... hehehe ... in my case I did not have the masks so I used one of the Crazy Birds, a little black acrylic to give it an old industrial tone and the tag is ready. Here another approach.


Aquí les estoy dejando el vídeo con las instrucciones paso a paso, espero que les guste y me den un like #^.^#.
Here I am leaving them the video with step by step instructions, I'm sorry is only in spanish, but if you want it, I can translate it, let me know. I hope you like it and give me a like #^.^#.


Gracias nos estamos viendo prontito.
Thanks see you soon

sábado, 28 de mayo de 2016

Tim Holtz 12 tags 2016 - Mayo/May


Hola a todos:
Hello Everybody:


Después de correr, como siempre (T_T), les traigo el reto del mes de mayo de Tim Holtz. Si no pudieron verlo aqui les dejo el link.
After running as usual (T_T), I could finish the challenge of Tim Holtz for May. If you din´t see it here is the link


Como se habrán dado cuenta, los retos de este año son una mezcla de dos técnicas que ya había utilizado en sus retos de tags de años anteriores. La primera técnica se trata de resistencias, para lograr esto se usa un poco de washitape, de preferencia de un color muy suave que no interfiera con el resto del proyecto. Aquí coloque un washi en dos lugares donde quería usar la técnica de resistencia.
As you may have noticed, the challenges of this year are a mix of two techniques that he had used in their challenges from previous years. The first technique is resistance, to achieve this you need to use some washitape, preferably of a very light color that does not interfere with the rest of the project. Here I used washi in two places where I wanted to use the resistance technique.


Con una tinta a prueba de agua, sobre el washitape, sellan la figurita que más les gusten, en mi caso use los Crazy Birds de Tim Holtz. Luego pueden colocar diferentes sellos en las partes que no tiene washitape, estos formaran parte del fondo.
With a waterproof ink, on the washitape, you can stamp any form you like, in my case I used the Crazy Birds of Tim Holtz. Then you can put different stamp on the parts that do not have washitape, build the background.


La siguiente parte, es agregar pasta texturizada con diferentes esténciles, que vayan más o menos con la idea del proyecto.
The next part is to add texture paste with different stencils, that goes more or less with the project idea.


Luego solo nos queda colorear nuestro fondo, con diferentes tintas y medios, aquí use distress inks y perfect pearls mist, en la técnica original usan distress paints, que son como acrilicos, como ya les habia comentado por aqui todavia no llegan. Los colores quedaron un poco suaves como watercolors.
Then we just have to add color to our background with different inks and media, I used distress inks, in the original technique he used distress paints, which are like acrylics, as I had already told you they not come here yet. The colors were a little soft like watercolors.


La segunda parte de la técnica era usar el cortador tiny tattered floral de Tim Holtz, lamentablemente todavía no llega por aquí. Con la ayuda de la silohuette cameo, logre obtener unas bases de flores similares a la de la tecnica.
The second part of the technique was to use the  tiny floral tattered cut by Tim Holtz, unfortunable they not come here yet. With the help of the silohuette cameo, I could obtaining a similar shapes like those flowers.


Luego solo queda colorearlas y armarlas, yo use los mismos colores del fondo para pintar las flores darle mayor realce.
Then just is matter of color them and assemble them, I used the same background colors to paint the flowers to give greater visual effect


Algunos elementos más para embellecer el cuadro y listo el reto.
Aquí les dejo unos acercamientos.
Some more elements to embellish the box and the challenge is ready
Here are some details.


Finalmente, no puedo irme sin dejarles el video de las técnicas. Aqui esta, con algunas fotos de la tag en el video.
And finaly , I can´t leave witout leaving the tecnique video. So here it is, with some pictures of the tag from the video.


Muchas gracias por darse una vueltita por aqui.
Nos vemos en el siguiente post.
Thank you so much for stopping by.
See you in the next post.

jueves, 28 de abril de 2016

Tim Holtz 12 tags 2016 - Abril/ April


Hola \(^o^)/
Hello \(^o^)/


Espero que hayan estado muy bien, la semana pasada fue de semana de feria de manualidades en Lima, y por primera vez me atreví a participar en un concurso de tarjetas creada por una de las tiendas que vende materiales de scrap (Lápiz de Papel) y que creen, fui una de las ganadoras, estoy tan feliz, nos tomaron fotos, expusieron nuestros trabajos y nos dieron regalitos yeahhhh (^-^), en los próximos post voy a ir colocando las tarjetas que prepare para el concurso y las técnicas que use.
I hope you have been very good, last week was a week of craft fair in Lima, and for the first time I dared to participate in a contest card created by one of the stores that sell scrapbook materials (Lápiz de Papel) and guess what, I was one of the winners, I'm so happy, they took us pictures, they presented our work and gave us little gifts yeahhhh (^-^), in the next post I will be putting the cards I prepared for the contest and the techniques that I used.

Ahora si al post de hoy, por fin termine la tag y la tarjeta que prepare para el reto del mes de Abril de las 12 tags de Tim Holtz. Aqui les dejo el link al blog de él y a las técnicas originales. Una cosa que me prometí al iniciar este reto es que si podía conseguir los productos de Tim Holtz para hacer las técnicas que el enseñaba los iba a comprar, habiendo dicho eso, para este reto se me puso un poco difícil porque muchos productos no llegan a Perú, pero para eso esta la creatividad, si ustedes pueden encontrar sus materiales cómprenlos ... jajaja ... muero por tenerlos.
Ok, now to our business, finally I finished the tag and the card I prepared for the challenge 12 tags of 2016- April from Tim Holtz. Here is the link for his blog and to the original techniques. One thing I promised myself at the begin of this challenge was that if I could get the products of Tim Holtz to make the techniques he taught, I was going to buy them. Having said that, for this challenge I got it a little bit difficult because many products for the techniques are not sell in Peru, but for that is the creativity, if you can find them buy them they are pretty cool ... lol ... I die for have them.

La primera parte de la técnica era trabajar con resistencia de pinturas. Para eso había que usar un cartón con relieve, use el woodgrain esténcil de Tim Holtz con la big shot y le pude dar un relieve bonito,  sobre el relieve se tiene que usar distress paint, pero aquí como mencione nadie lo trae, leyendo los componente vi que la pintura acrílica un poco húmeda podía servir para reemplazarlo.
The first part of the technique was paint resist. For that you have to use a cardstock with texture. I used the woodgrain stencil from Tim Holtz with the big shot to emboss the cardstock and give it some texture, over the emboss you used distress paint, but here as I mentioned before nobody brings it, reading the components I saw that a little wet acrylic paint could be used to replace it.


La pintura nos va ha dar un poco de resistencia cuando usemos las tintas distress y va a poder verse el diseño en altorrelieve. Para darle color use los distress broken china, chipped sapphire, brused corduroy y gathered twigs.
The painting is going to give us a little resistance when we use the distress inks and will be visiblethe emboss design. To color I used broken china, chipped sapphire, brused corduroy and gathered twigs distress inks.


La segunda parte de la técnica era imitar la textura de las baldosas, para la figura elegí algunas flores del cortador Tattered Flowers de Tim Holts para Sizzix. Para imitar el efecto de las baldosas se usa el kid especial para esta técnica que tiene Tim Holtz, es un producto nuevo y todavia no está para ser importado a mi país, creanme pregunte por todos lados ..... (ーー;). En la técnica original usaba glossy acents para crear ese efecto y por suerte eso si llega a mi país, ese producto y un poco de pasta para texturizar, muchos papelitos japonese de origami y se pudo imitar el efecto.
The second part of the tag was Faux Mosaic, for the figure I chosed some flowers from Flowers Tattered die cut by Tim Holtz from Sizzix. To mimic  this technique you need the distress paper mosaic kit from Tim Holtz, is a new product and still is not to imported to my country, believe me I ask everywhere ..... (ー ー;). In the original technique, before the paper mosaic kit, he used glossy acents to create that effect and luckly that product you can find in my country, that and some texture paste, many pieces of origami paper and I could mimic the effect.


Para los toques finales, rocié una cartulina blanca con varios colores naranjas y rosados y corte la tag y la palabra Hello. Le puse algunas hojitas, botones, mariposas, detallitos en metarl y quedo lista.
For the final touches, I spry a white card with several orange and pink colors and cut the tag and the word Hello from it. I put some leafs, buttons, butterflies, little details in metal and the tag is ready.


Para el video que les prepare de las técnicas me decidí por usar la tag en una tarjeta para cumpleaños, aqui les dejo unos acercamientos y el video.
For the video I prepare with the techniques I decided to use the tag on a birthday card, here I leave some approaches and video. I´m sorry the video is in spanish but if you wanted in english I can translated for you.


Espero que les haya gustado y me dejen sus comenarios .
I hope you like it and live me your comments, I will appreciated.

Un abrazo a todos, nos vemos en el siguiente post.
A big hug for you and see you in the next post.